Thoughts about teaching electricity:
Such a topic lends itself to practical work, but consider
the
advantages of using simulations first. Then the students can see what
is supposed to happen before they do the real experiment. The main links are on the Links4Learning page.
Note that whenever investigations are carried out, it is an ideal time to emphasis the need for good experimental design such as control of variables, consideration of independent and dependent variables, graphing the results.
Suggested teaching sequence is:
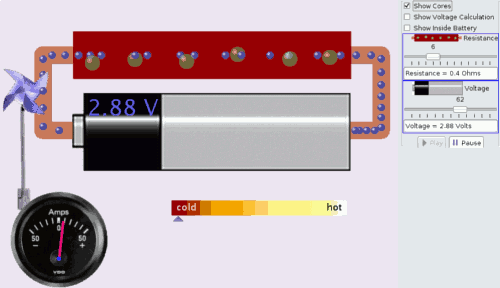
- The nature of an electric circuit could be discussed lots using the battery-circuit simulation. An analogy is developed by asking questions like how is voltage represented? How is current represented? What is happening in the resistor? Allow students to record what is discussed in class using OneNote, knowing that they will be presenting an investigation to the class later. Follow on with a quiz using Student Response Network (SRN). Perhaps follow on with a simple light globe circuit to investigate voltage and the condition of a complete circuit.
- Use the same battery-circuit simulation to do practical investigations such as: "What happens to the current if the resistance is increased?"; "What happens to the current if the voltage is increased?". Students could be asked to use OneNote to label a capture of the simulation in terms of what it is showing. An analogy could also be developed from the simulation.
- Other lessons may use the SMART Board software to discuss the issues of series and parallel circuits.
- Students then use the "Series and Parallel circuits" object from TALE (Search for Series and parallel circuits). This includes the circuit symbols (not NSW standard) so this could be used to create their own sheet of circuit symbols. It leads students through resistors in series. Use this" Series and Parallel circuits" object as an investigation preparing for later construction of real circuits...
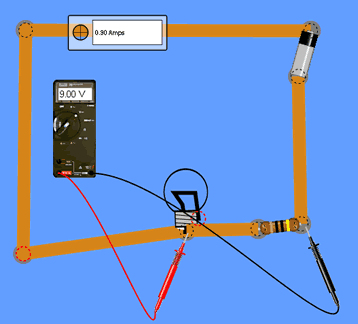
 Use the circuit construction kit to complete a number of circuits as set by the teacher.
This could then lead into a number of investigations for groups
to complete practical reports on their investigations, using the
simulations. All circuits and results could be captured into
OneNote. This could then be followed up with a few investigations using real equipment. Either way, the end product will be a number of practical reports. Example investigations are:
- Does it matter which order the components are placed in the circuit?
- What happens to the current when more resistors are placed in series?
- What happens to the current if the resistance is increased? (All students should probably do this one. Set different groups to have different values of resistors or slightly different circuits).
- What happens to the current if the voltage is increased? (All students should probably do this one - a good one to also graph the results).
- Is the current different at different locations? (Do this for series and parallel circuits with different value resistors).
- What happens if more resistors are placed in parallel?
- Construct a circuit with at least 2 resistors in series - Resistor A and resistor B. Place a voltmeter on Resistor A, and measure the current. What happens to the voltage if the resistance of resistance A is increased? What happens if the value of resistor B is changed?
- Have a few circuits which do not work, and ask the students to work out why they are not working properly, and fix them suing the same circuit construction kit.
- One investigation is presented to the class - perhaps a circuit with a specific application - a result of some research.
Other ideas...
- There are worksheets provided on the Curriculum Directorate page for this topic. These could be used by students to practice making circuit diagrams that you have previously indicated in Fireworks or Photoshop. They could also be made into puzzles using hot potatoes or CLI applets. Get the program to mark it. Add them as quizzes to your Moodle site. Students use OneNote to record their final score if done as homework - email the screen capture file from OneNote to their teacher. The Voltage and Current worksheet includes an embedded spreadsheet to help students analyse their results.
- Alternatives could be to use an applet such as Walter Fendt's to lead students through the simulation and talk about what is happening in each circuit. Also see the resources on SmartBoards.
- If you extend the students into Ohm's law, there is are various applets on Ohm's Law too (such as Walter Fendt's).