This page shows how to obtain pictures from the camera for the laptops supplied to teachers. It has been updated for the changes which occurred at the end of term 2, 2010.
Note that some DER laptops have different program settings. So, I will show different ways to capture pictures from the camera....
1. Debut
Debut is a movie and screen capture and camera tool. It can also capture still shots.
- Open Debut,
- Choose the webcam option,
- then take a still camera shot, as shown in this movie.
The photo is stored in the videos debut folder.
2. "QuickMark - Snipping tool" method
This is the method that works on mine...
- Open "QuickMark" - which displays the camera
- Open Snipping Tool
- When the screen dims and a cross appear on the screen, drag over the area desired from the camera
- Save the picture
View a captivate movie of this "QuickMark - Snipping Tool" method.
3. "QuickMark and OneNote" method
The OneNote screen capture is designed to capture directly into your notes.
- Open "QuickMark" - which displays the camera
- Hold the Home key and press the s key. When the screen dims and a cross appear on the screen, drag over the area desired from the camera OneNote should open with the captured picture already annotated with the date and the time.
 4. OneNote camera capture
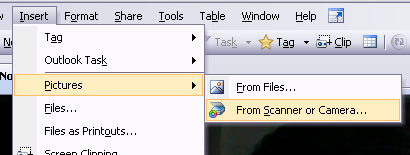
The the best way I could find to capture images is straight into OneNote. From the menu in OneNote choose Insert Pictures From Scanner or Camera. This should capture the image directly into Onenote, but this is not available on some of the laptops.
5. Captivate
Some ask why I wouldn't use Captivate to get a screen shot. Yes captivate will get a screen shot, but it is a much bigger program than the others, and so takes more time to achieve the same effect. Captivate is designed to produce Flash movies that are efficient because they use a series of still shots with the moving mouse over it. I think the other methods are simpler to achieve a simple screen capture.